Laser and projection versions
You need:
- Your own shotgun - there is no point practising with a toy gun - or even with someone else's gun.
- A suitable room.
- A PC or laptop.
- A DryFire system: laser or projection.
- A PC data projector - required only for the projection version of DryFire.
Room
You need a room about 4m x 4m or more with at least one plain wall. There should be no direct light on the wall or facing it and overall lighting should be subdued (not dark!) with curtains drawn to keep out sunlight - a source of infra red light as used by the DryFire gun assembly
The simulator hardware is the same for the laser and projection versions (see below) - the software operates differently.
The simulator is placed about 1m off the floor and about 1.5m from the wall/screen. The simulator can be placed on any surface or on a tripod using the tripod bush in its base. For permanent installations, using a suitable adapter (not supplied by us), the simulator can be mounted upside down on a ceiling - the DryFire software allows for this.
Your shooting position is behind the simulator, about 2.5m from the wall/screen.
Take care that your gun movement doesn't bash into the simulator - that could be expensive!
PC requirements
You need a PC or laptop with a spare USB port running either:
- Microsoft Windows 10/11 (version 1809 or later) with an Intel or AMD processor (not ARM).
- Apple MacOS (version 10.14 (Mohave) or later).
Check you have the latest Windows/Mac updates installed.
Laser version
Note: the laser version of DryFire does not require a PC data projector.
This is the original version of DryFire which, over the last 20 years, worldwide, has helped tens of thousands of shooters to improve their scores.
The laser version generates targets as moving laser dots on the wall in front of you so you need a wall (or screen, or a sheet, or any plain background) at least 4m (12ft) wide. Rough walls are not a good idea (the laser dot gets lost!) so paint or wallpaper are fine.
We don't all have the luxury of the perfect room and the animation below shows the third storey room in which DryFire was first invented.
Note the sloping ceiling, the radiator and the peninsular desk unit that makes it impossible to stand directly behind the simulator. DryFire has settings to allow for the roof angle and the fact that the shooter is standing to one side.
Projection version
The projection version is used with a short-throw PC data projector (not supplied by us) so you need a screen or surface that provides a good clear image. Screens come in different sizes but 10ft wide or more would be great.
The software projects a background onto the screen and the targets are computer generated "clays" which "explode" when hit.
The projector usually sits on the floor in front of the simulator
Animation of a typical projection room setup
The animation below shows a typical room setup for the projection version of DryFire. In this case a projector and screen are shown but the room requirements are the same for laser and projected targets.
The room is about 4m x 4m with a ceiling height of 2.4m. The simulator is mounted 0.65m from the floor and 1.75m from the screen. A short-throw projector is on the floor immediately in front of the simulator stand. The shooter will be standing behind the simulator, 2.5m from the screen.
Important note: the vertical bar, arrows and Post-it notes are used at different stages during projection setup - they, and the background image, are not all on the projection screen at the same time.
Projection requirements
Wordcraft does not supply PC data projectors but a suitable specification is shown below.
Screen or wall?
The further you stand from the wall/screen, the wider the wall/screen must be - so, don't stand too far away - 2.5m (8') is more than enough.
It is worth remembering that you should be taking your shots within your comfort zone - directly in front of you when facing the wall/screen - you should not be chasing crossers into the ground!
You can use a plain wall or a home cinema projection screen with an aspect ratio of 16:9. Large screens are not cheap but they may be brighter than a painted wall. Try a web search for paint for home cinema screens if you want to try painting a wall.
You have a choice if you find trajectories starting or ending beyond the projected screen image:
- Get a larger screen - or paint a wall.
- Stand closer - and tell the DryFire software you are standing closer. Never stand more than 2.5m from the wall/screen.
- Use laser targets for wide crossers - see "Horses for courses" below.
Horses for courses
With the projection add-on targets can be shown as laser dots or as images of clays.
Some disciplines have very wide targets, skeet station 4 for example, and it is unlikely the complete trajectory of the clay will fit on a projection screen.
If projection is selected DryFire can show a clay image on the screen and a laser dot for those parts of the trajectory outside the screen area. This switching between projected images and laser dots is very clever but it gives your brain one more thing to worry about when you should be focussing 100% on the target.
We recommend using laser dots for targets that go beyond the limits of the projection screen. That's one of the reasons why you should become familiar with laser targets before setting up the projection add-on.
Laser targets first
It is very important that you start by setting up and using laser targets before setting up the projection add-on. This ensures that everything is set up correctly and allows you to become familiar with the system before using the projection functions. You will also see why some targets are best presented as laser dots rather than projected clay images.
Projector specification
Wordcraft doesn't supply projectors so you will need to purchase a suitable projector locally.
Using extended mode projection
The DryFire projection add-on requires your projector to operate in extended mode, not duplicated mode, so make sure you are confident using extended mode before installing DryFire.
Obviously Wordcraft can't recommend specific projectors (because we haven't used them all) and different manufacturers provide different projectors under different names in different parts of the world. The key thing is to project a large and clear image on a wall or screen in front of you when using DryFire. A specification similar to the one below (taken from the Optima GT1080 Darbee projector) should enable you to locate a suitable projector in your area.
- Short throw or ultra short throw. These can be placed low down close to a screen or wall.
- Resolution: 1080p 1920 x 1080.
- Aspect: Ratio 16:9 Native, 4:3 Compatible.
- Brightness: 3000 ANSI Lumens or more.
- Contrast: 28,000:1.
- Throw Ratio: 0.49:1 (or similar).
- Zoom Type: Fixed (or variable).
- Projection Distance: 0.5 - 3.35 metres.
The projector must be set up to produce a true rectangular image that fits within the boundaries of the screen or wall being used. No part of the image should be off the screen, on side walls, on the floor or on the ceiling.
Ensure the projector's aspect ratio is set to "Native" or "Auto" and that any "Image shift" or "Zoom" features are set to zero.
Examples of projection setups
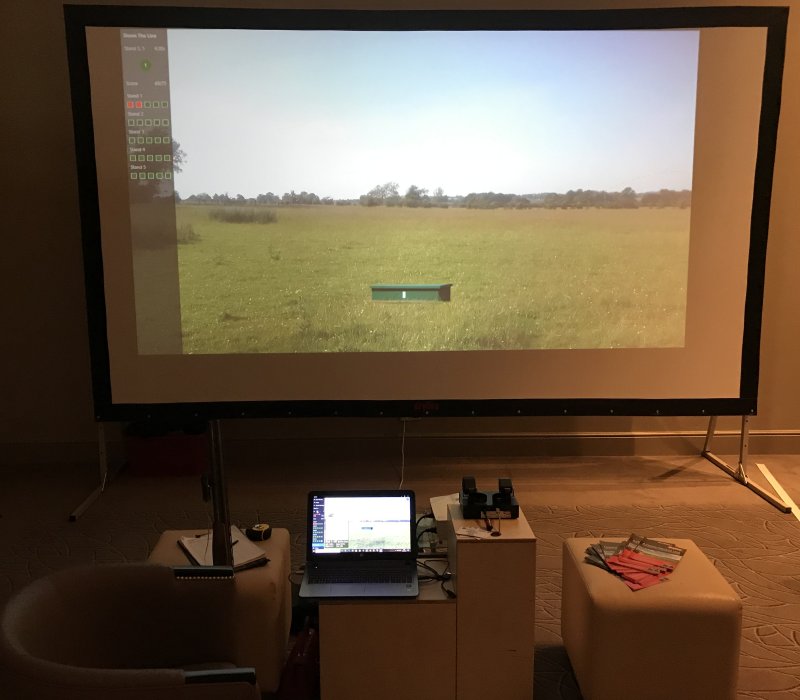
The photo below shows DryFire with the projection add-on set up for the CPSA dinner at the Belfry Hotel. Note the large portable screen and the use of a simple stand.
The projector can't be seen - it is on the floor on the other side of the stand.
Note the true rectangular image that fits within the boundaries of the screen.
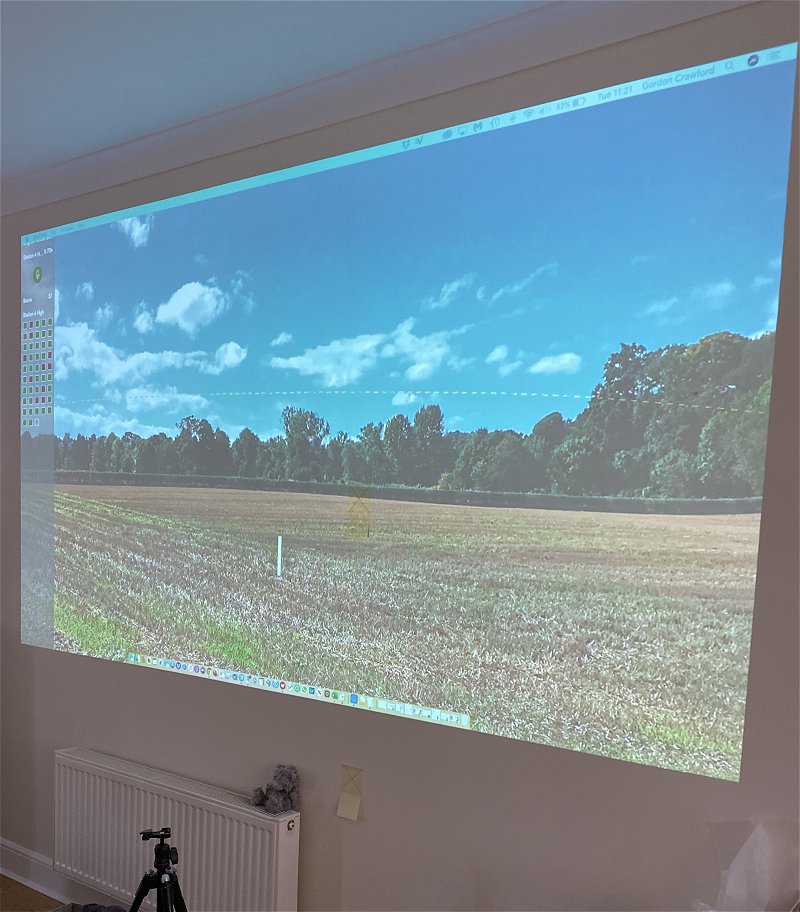
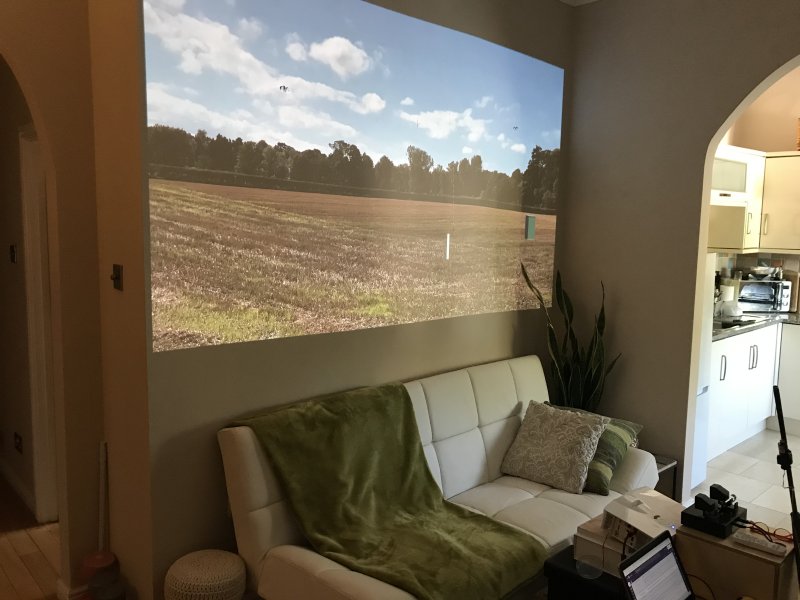
The two photos below were sent in by a DryFire customer showing the projection add-on being used in a fairly small space. Two pictures have been temporarily removed from the wall so it can act as a screen - the fittings can still be seen.
Note the fact that the whole of the rectangular image fits on the wall.
It looks like this is set up to shoot targets from Skeet stand 1 - the low house is in the distance on the right.
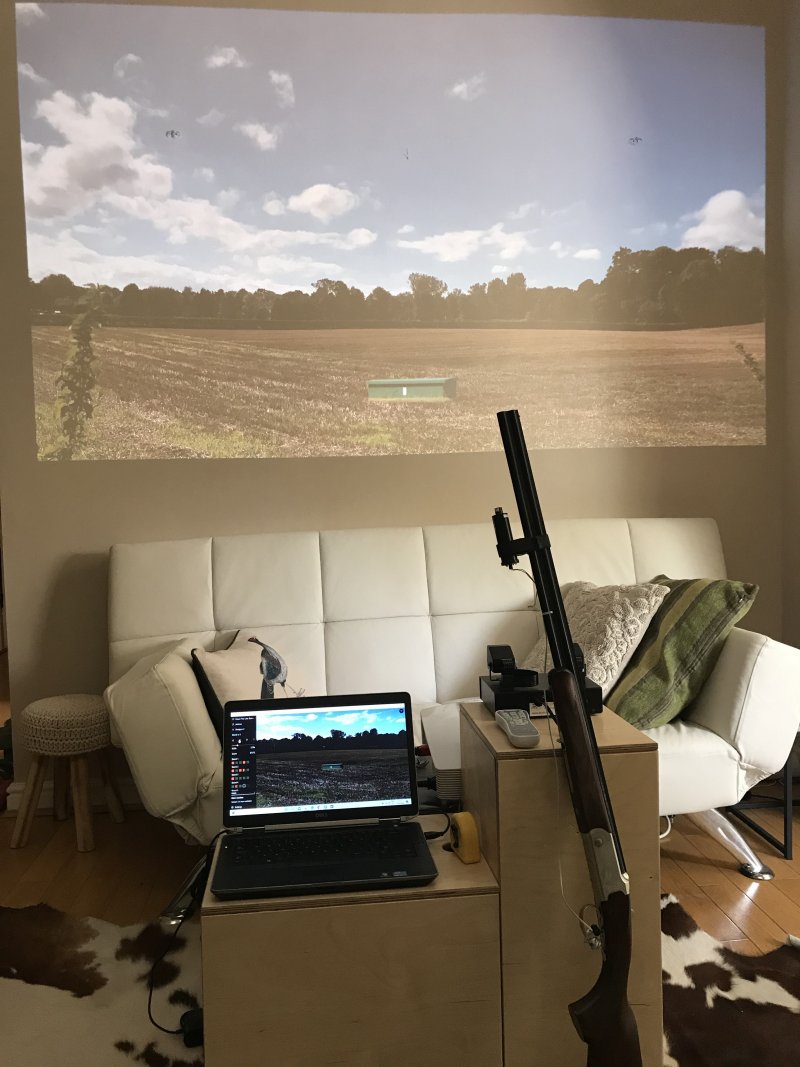
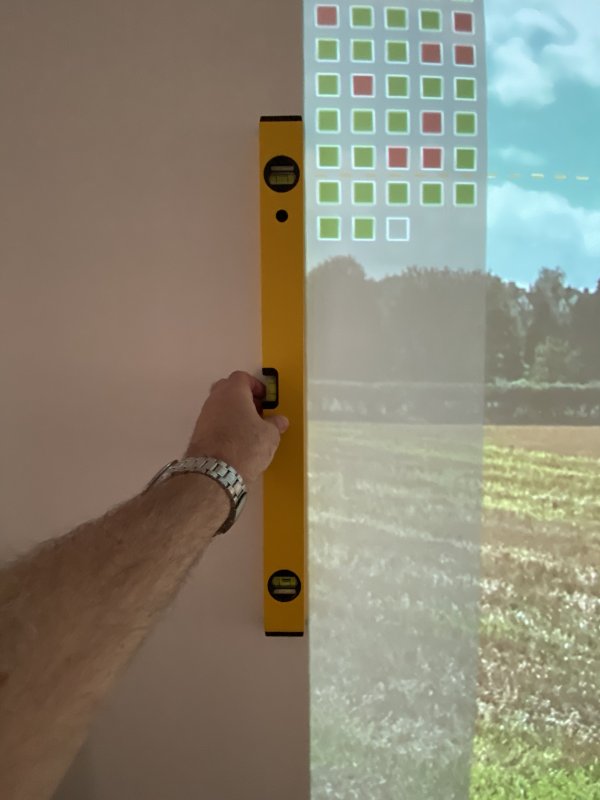
Checking that the projected image is perfectly square and upright.
From a customer using an Apple Mac. Now, that is a good sized image - and it looks like a skeet crosser!