TS22: Trigger switch
The optional TS22 trigger switch operates when the trigger blade reaches its most backward position as you shoot.
TS22 is available from the store
With unrestricted access to the front of the trigger blade, TS22 provides the "trigger feel" that many top shooters find important when shooting.
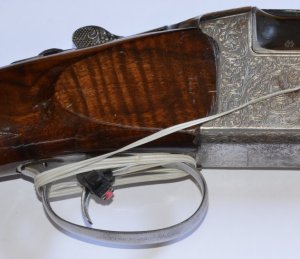
Wrap round trigger switch
TS22 is an optional accessory and may be used instead of the wrap-round switch provided with DryFire.
The DryFire wrap round trigger switch has stood the test of time (over 20 years!), can be used with any sort of gun, and is the standard switch provided with every DryFire system.
The photo below shows the wrap-round trigger switch set up for a left handed shooter. The "tail" of the tie is on the opposite side to the trigger finger and excess cable is wrapped round the trigger guard.
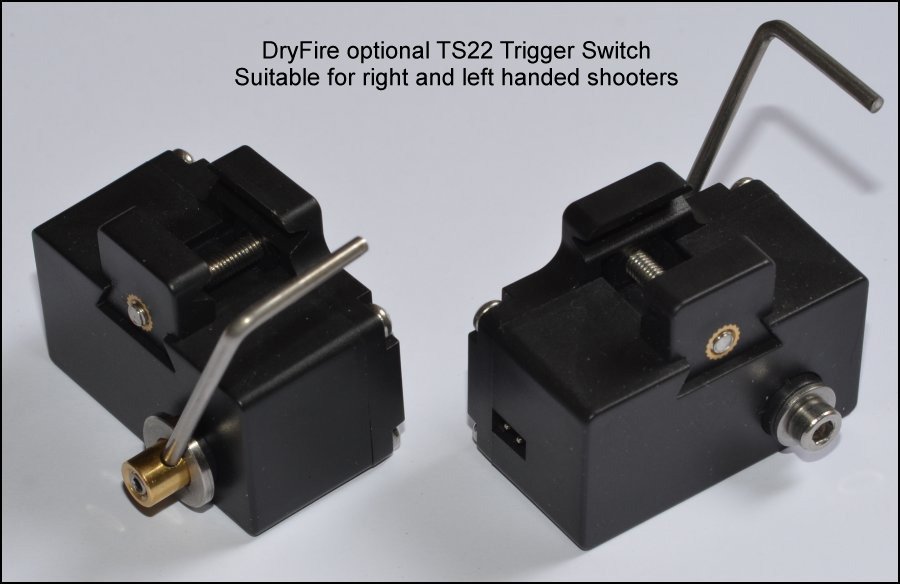
TS22 for right and left handed shooters
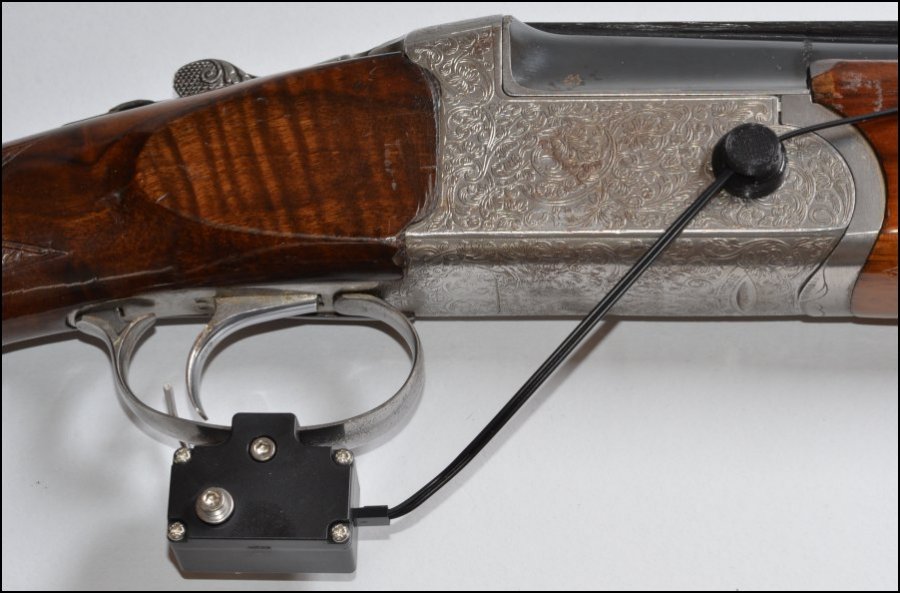
The photo below shows the TS22 trigger switch set up for a left handed shooter.
Note: the operating arm is on the opposite side to the trigger finger and a magnetic clip holds the cable to the gun's action.
The photo below shows the TS22 trigger switch set up for a right handed shooter.
Note: the operating arm is set so that it activates when the trigger blade is at its most rearward position when the trigger is pressed.
TS22: component parts
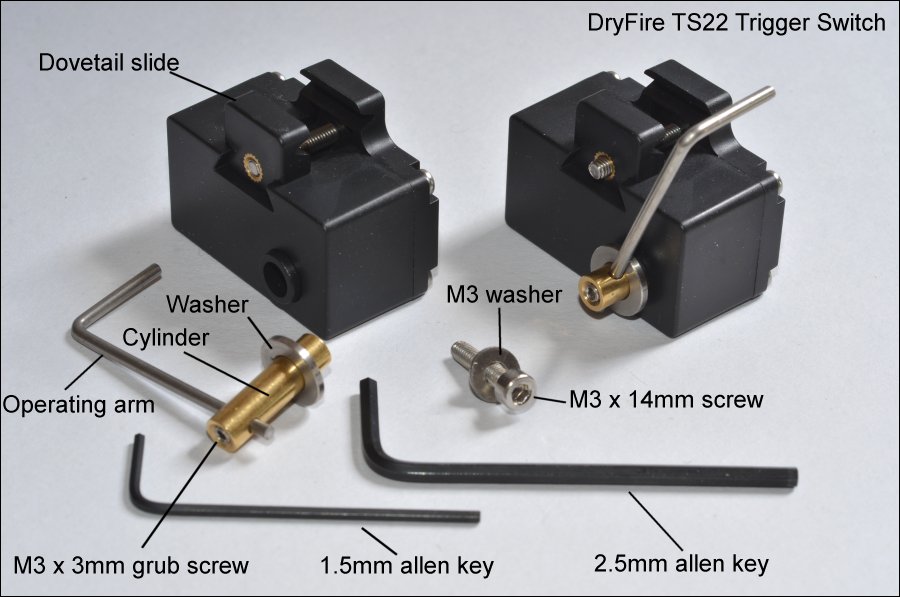
- Dovetail slide: fits the switch to the trigger guard.
- Operating arm: fits behind the trigger blade and moves backwards when the trigger is pressed.
- M3 x 3mm grub screw: holds the operating arm in place in the cylinder.
- Cylinder: passes through the body of the switch and rotates to operate the switch.
- Washer: fitted on the cylinder between the operating arm and the body of the switch.
- M3 x 14mm screw: holds the cylinder in place.
- M3 washer: this fits between the M3 x 14mm screw and the body of the switch.
- 1.5mm allen key: for fitting the M3 x 3mm grub screw.
- 2.5mm allen key: for fitting the M3 x 14mm screw and the M3 x 18mm screw in the dovetail slide.
TS22: Installation
Please follow the fitting instructions carefully - they may seem a little "fiddly" the first time you use them but from then onwards fitting TS22 should take only a few seconds: fit to guard, slide to correct location, lock in place.
The instructions allow you to set up for right hand or left hand use.
Important warning
Do not put the operating arm hard up against the trigger blade.
The operating arm rotates very slightly (about 1.5mm - see the video below) - trying to force it beyond this limit of movement will damage the switch. When installed correctly the switch should operate during the last 1.0mm/1.5mm of trigger movement.
You can feel, and perhaps hear, the internal switch operating as the operating arm is pressed.
Fitting instructions
- Use the 2.5mm Allen key to remove the operating arm and brass cylinder by undoing the M4 14mm cap head hex screw. Don't lose the washers!
- Use the 2.5mm Allen key to slacken off the M3 18mm cap head hex screw that holds the dovetail slide in place. Don't remove the screw entirely.
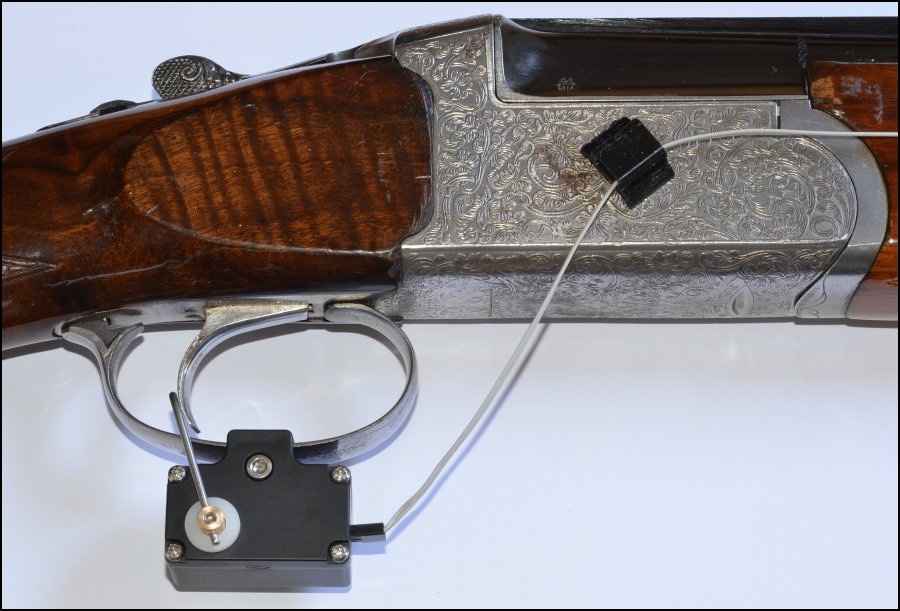
- Fit the body of the switch to the trigger guard - the edges of the guard will fit into the horizontal slots in the dovetail slide and body.
Don't over-tighten - firm but not tight is correct!
The switch should be under the centre of the guard - see the photo above.
- Insert the brass cylinder (with operating arm and washer) into the switch body (with the top of the operating arm behind the trigger blade) and hold it in place using the M3 14mm cap head hex screw.
Don't tighten the screw at this stage.
The cylinder should be inserted into the side opposite to where your trigger finger will go so the operating arm does not interfere with your trigger pull.
- Adjust the position of the operating arm so the horizontal top rests where the back of the trigger blade will be when a shot is taken. If necessary adjust the length of the operating arm by slackening off the M3 grub screw using the 1.5mm Allen key.
- When everything is in place you can tighten up the M3 14mm screw holding the cylinder in place.
Don't over-tighten - firm but not tight is correct!
- From now on you should never have to adjust the length of the operating arm - slacken off the M3 18mm screw for the dovetail slide for it to open up enough for you to remove and refit the switch.
When next fitting the switch, adjustments to the location of the top of the operating arm can be made by sliding the switch backwards or forwards on the trigger guard before fixing it in place.
- Connect the trigger switch to the Standard Gun Assembly (SGA) using the 2-way, female to female cable.
Switch on the UGA and press the trigger - you should see the red LED flash on the UGA.
Trigger mechanisms and flinch
When shooting outdoors the trigger mechanism is set for the first shot when you open and close the action. We do not advise opening and closing the action when using DryFire - it isn't necessary and you don't want snap caps flying around the room!
When shooting outdoors the method used to set the trigger for the second shot depends on the type of trigger system.
- Inertia block triggers use the recoil from the first shot to set the trigger for the second.
- Mechanical triggers set the action for the second shot when you pull and release the trigger - not on recoil.
Normal v release
The majority of guns use a "normal" trigger - the shot is fired when you press the trigger.
A tiny minority of guns are set to use a "release" trigger - the shot is fired when you release the trigger. This can be scary to many people because once you have pressed the trigger the shot will go off when you release it - no matter where the gun is pointing!
Release triggers are sometimes used by those who suffer from flinch but should only be used as a last resort when all other methods have been tried.
Practicing with DryFire does not involve recoil so flinch (anticipation of recoil) gradually disappears.
The TS22 trigger switch gives you that extra feel before the shot is taken - another step towards realism - and towards reducing flinch!