Software Installation and first targets
Please wait a few seconds for the video to load.
When to connect your simulator
Do not connect the power supply or USB cable until the software asks you to during installation.
When you are asked to connect check that you have connected both the power supply and the USB cable. Your PC should give a "beep" when the USB cable is connected.
One of three things may happen when you connect power and USB:
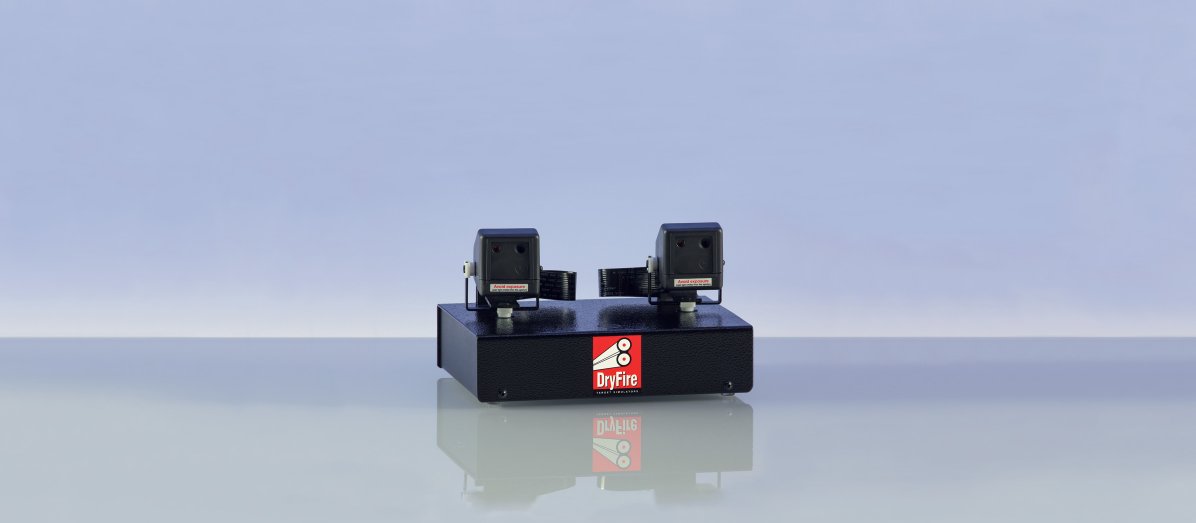
- The two heads will nod up and down - this is correct.
- The two heads will shake from side to side - this is a problem.
Remove the USB and mains cable and try again.
If the heads still shakes, rather than nods, Let the software load, select "Settings" then "Support" and follow the instructions here to send detailed diagnostic data to our support department. We will get back to you ASAP.
- Nothing.
In this case:
- Check that the USB cable is inserted into the simulator and into a USB port on the PC.
- Check that the power supply is connected to the mains and switched on.
- Check that you are using the 5V power supply that came with DryFire.
Using the wrong power supply will damage the simulator.
Please follow this link for a test procedure.
Step by step
- Check your PC speakers are switched on and working - or you won't hear "bangs" and spoken messages.
- Check the UGA is fitted to your gun and switched on - the LED will flash slowly.
- Check you have a Post-it note at the simulator straight ahead position and another at your straight ahead eye position.
- Do not connect your simulator to power or USB until the software asks you to do so.
- Download and run the latest DryFire software from this link.
- Select "Install" and then "Install drivers" - select to go ahead if you see any warnings.
- At this point you should connect the simulator to power and USB.
- Wait for the heads to nod and for the software to connect to the simulator.
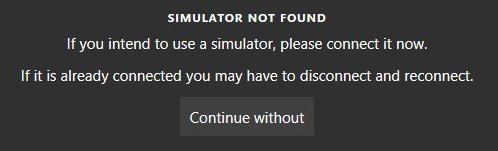
- The software should continue after the simulator is connected.
If it fails to continue, click on "Continue without" then close down the software and reload it. In Windows 10/11 you will find DryFire in the startup menu after clicking on the Windows logo icon - bottom left or centre of the screen.
After DryFire loads select "Settings" (bottom left), "Calibration" and "Full calibration" to carry out alignment.
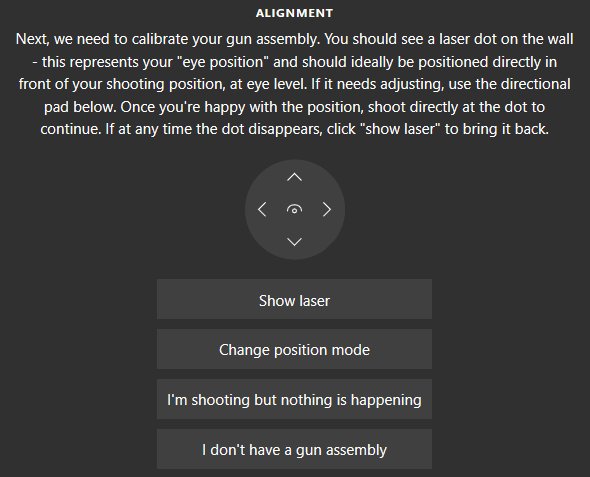
Alignment
Alignment (or "calibration") is a critical part of DryFire setup because "accurate alignment means accurate targets and accurate feedback". You have a choice of alignment methods.
Note: the option "I don't have a gun assembly" is for people trying the DryFire software before purchasing a system.
- Default
This is usually the easiest and quickest - you shoot at the Post-it note you put at your straight ahead eye position.
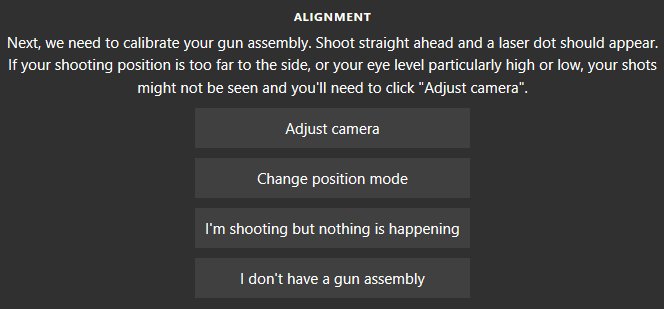
- Choice
Click on "Change position mode" to choose a different method.
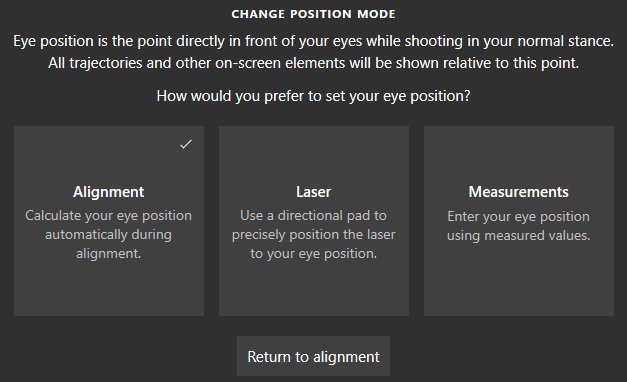
- Laser
This will display the laser dot and a compass rose so you can use your mouse to move the laser to the centre of the Post-it note at your straight ahead eye position.
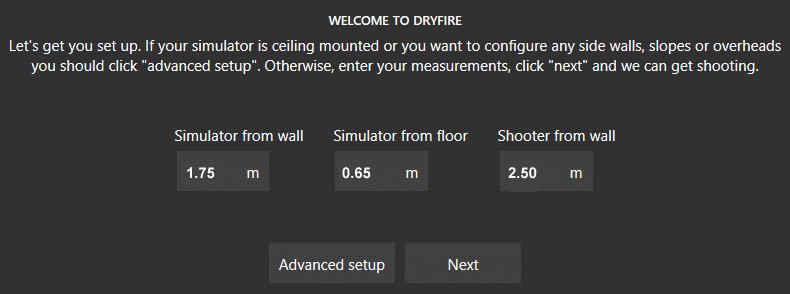
- Measurements
This allow you to enter all measurements manually.

The most important measurement are::
- simulator to wall,
- simulator height from floor,
- shooter to wall.
After entering the measurements click on "Next" - don't click on "Advanced setup" - this is covered here.
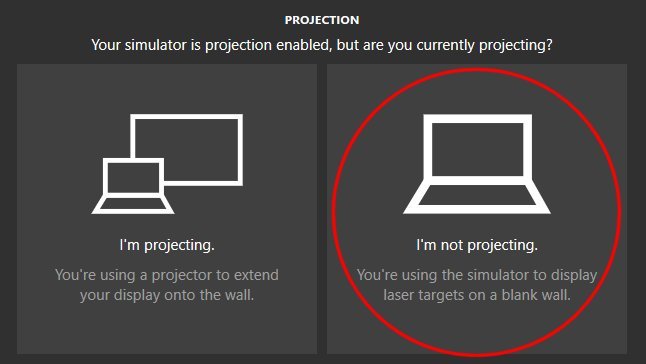
Laser targets first
Always start with laser targets - even if you have purchased the projection version.
This will ensure that all measurements are correct and targets are being displayed and hit (or missed!)
You can move on to projection setup when laser targets are working correctly.
Select "I'm not projecting".
Muzzle alignment
In future you will do muzzle alignment at the start of every shooting session (from the "Settings", "Calibration" menu) to enure that the UGA on the gun and the cameras in the heads are aligned.
Stand in your shooting position and follow the on-screen instructions to align your gun - look again at the video at the top of this page.
Note 1: during alignment you will be using your gun like a rifle to "aim" the bead at the laser dot.
Note 2: it is perfectly normal for the laser dot not to appear exactly at the centre of the Post-it note - this is all part of the calibration procedure.
Something is wrong if you hear an "Uh, uh" sound instead of a musical tone at the end of alignment. This may be because:
- your simulator to wall distance (1.5m to 2.0m) is incorrect,
- your simulator height (0.5m to 1.0m) is incorrect,
- your simulator is not parallel with the wall,
- something is lose on the simulator.
Work carefully through the whole setup procedure again and double check each measurement as you go. Remember: DryFire "thinks" in metric units so it might be best to enter measurements in metres.
Your first target
DryFire will take you directly to simulation selection but, if it doesn't, you can click on "Simulation" (top left).
- Select "Trap", then "DTL" then "Start".
- Click on the triangular play symbol - this will change to a green microphone symbol.

- The software will "beep" when it is listening for you to call "Pull".
- Take up your normal shooting position with gun mounted and a hold point just above the first Post-it note.
- Call "Pull", acquire the laser target, swing, lead, fire, follow through and relax.
Congratulations - you have taken your first DryFire target.
Don't worry if you missed - try this procedure:
- wait for the “beep”,
- call "Pull" a few times,
- make a mental note of where the target starts,
- decide on your hold point,
- try again.
- Don't forget lead!
Camera setup
Do this only if your shots are not detected or the system is seeing stray shots.
- Make sure no direct light reaches the wall/screen Check windows, doors, ceiling lights and wall lights - and possible reflections.
- From "Settings" select "Calibration" then "Adjust shot detection".
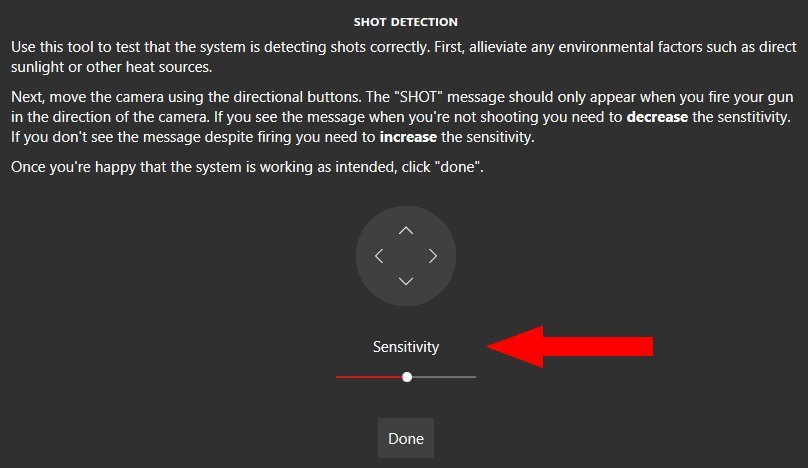
- Use the compass rose to move the camera head around and try shooting at the area it is pointing to. You should see the "SHOT" message if the system detects your shot.
- If your shot isn't detected, drag the white spot slightly to the right to increase the camera sensitivity then try again.
- You must find the maximum sensitivity without the system seeing background light.
If you can't get the right setting there will almost certainly be stray light reaching the wall or screen.
Microphone setup
Do this only if your targets are not being released when you call “Pull”.
- From "Settings" select "Target release".
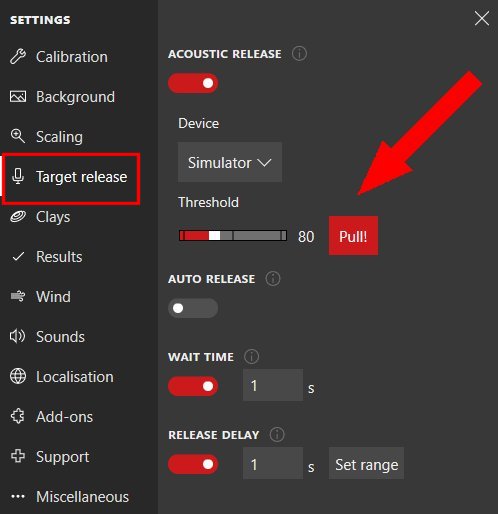
- Change the "Threshold" setting and call "Pull" - the word "Pull" will be shown in red next to the threshold value if the system hears your call.
- Continue adjusting the threshold until your call is heard.
During normal use:
- the software starts listening after you have selected a simulation and after you have clicked on the triangular "Play" symbol on the control bar (top left).
- The system will beep, and the symbol will change to a green microphone, when the system is ready.
- After shooting at each target you should wait for the beep before calling for the next.