How it works - and different versions
The FAQ article answers many of the questions you may have about DryFire.
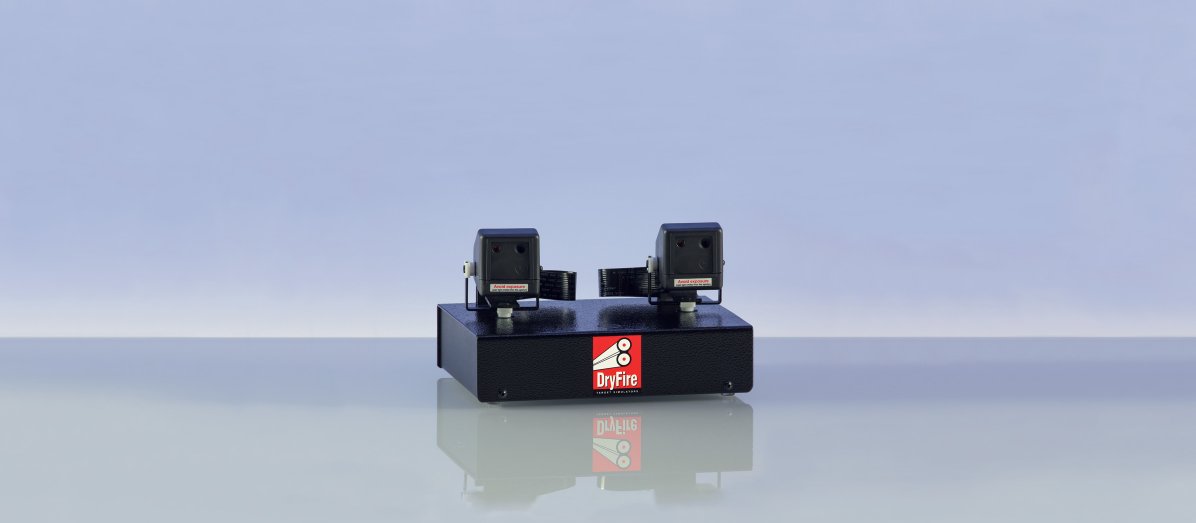
The DryFire simulator has two heads each containing a laser to generate the target and a camera to spot your shot. It also contains an acoustic release so you can call "Pull" to release targets.
This video shows the simulator displaying simultaneous doubles on skeet station 4 - wide crossers from left and right. Note how the movement starts quickly then slows as the target floats to the ground.
With two heads DryFire can reproduce singles, simultaneous doubles and on-report doubles.
The same simulator hardware is used for the laser-only version and the projection version - the difference is how the software works.
Lead ("Leed") - and wide targets
Those familiar with computer games know they require you to aim at the target.
DryFire is not a computer game!
DryFire provides serious and intensive practice while saving on cartridge and clay costs.
"Aiming" at targets with DryFire will cause you to miss - usually behind - because the system requires the same amount of angular lead as outdoors.
For non-shooters: rifle and pistol shooters "aim", clay shooters "point"!
Computer games (and some other simulation systems) are required to fit on a PC screen or on a projected image in front of you. Many of the targets we see outdoors: wide crossers, skeet station 4, teal, etc; will not fit completely on a screen - the angles are too wide.
When using the lasers DryFire can generate targets from 90 degrees to your left to 90 degrees to your right. It can also generate them from ground level in front of you to almost up and over your head!
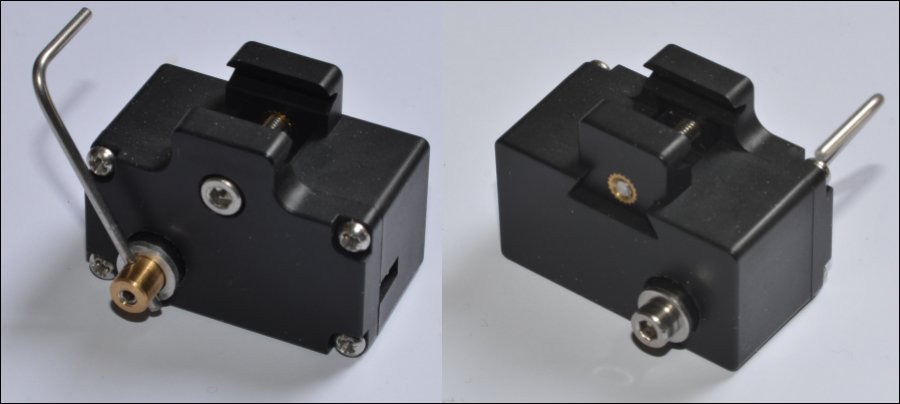
The DryFire Standard Gun Assembly (SGA) clips under the barrel of your shotgun. The unit contains a CR2032 button battery which should give at least six month#s use before it requires changing.

The standard DryFire wrap round trigger switch is fitted to your trigger and is activated when you press on it.
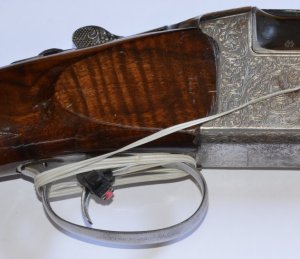
The optional TS22 "behind the trigger" switch clips to your trigger guard and is activated as you move the trigger backwards.
When the trigger switch is activated the system plays a "bang" sound and the UGA sends out a very short pulse of invisible infra red laser light. This strikes the wall in front of you and is seen by the camera in the simulator head.
The simulator sends the location of the infra red laser spot back to the PC and some very clever calculations work out where your shot pattern would be at its closest point to the target.
This is then reported back to you visually - all done in a fraction of a second!
The laser version
The laser version generates targets as moving laser dots on the wall in front of you - see the video on the home page.
No PC data projector is required and there is no image projected onto the wall.
This is the original and simplest version of DryFire - it takes things back to the three most important things in clay shooting (according to George Digweed - and he should know!): the target, the target and the target.
With the laser version there are no distractions so 100% of your attention can be on the target - the laser dot, the clay.
Some people like to keep things simple because there are fewer things to worry about, fewer things to set up and fewer things to go wrong!
You can upgrade the laser version at any time to the projection version by purchasing the projection software add-on. You will also need to buy a PC data projector - not supplied by us.
The projection version
Important note: the projection version of DryFire requires a PC data projector. This is not supplied by us and must be purchased separately. The specification for a suitable projector is provided in our "What you need" article.
The projection version projects an image of the layout in front of you and the targets are computer generated images of clays (not laser dots) which "explode" in a very pleasing way when hit!
The projection version can be used in laser-only mode if you wish - when you don't want to set up your projector and screen.
Disciplines supported
DryFire can reproduce the complete range of clay disciplines ("layouts") including:
- "Trap": DTL, ABT, ATA, Olympic, Double Rise, Universal Trench, etc.
- Skeet: English, American, Olympic.
- Sporting: incoming, going away, quartering, crossers, rabbit, tower, teal, etc
- FITASC
- COMPAK
Feedback: shot Results
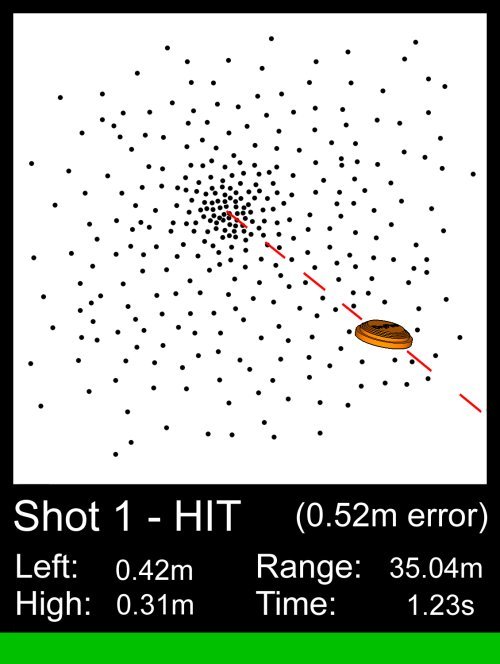
Given the right background, a sharp-eyed instructor can sometimes call the position of your shot pattern. DryFire does this for every shot. It shows the exact shot pattern (depending on choke, cartridge and distance) relative to the clay.
With DryFire you get detailed feedback every time - hit or miss. It tells you exactly how far you were above, below, ahead, behind the clay - to the nearest centimeter.
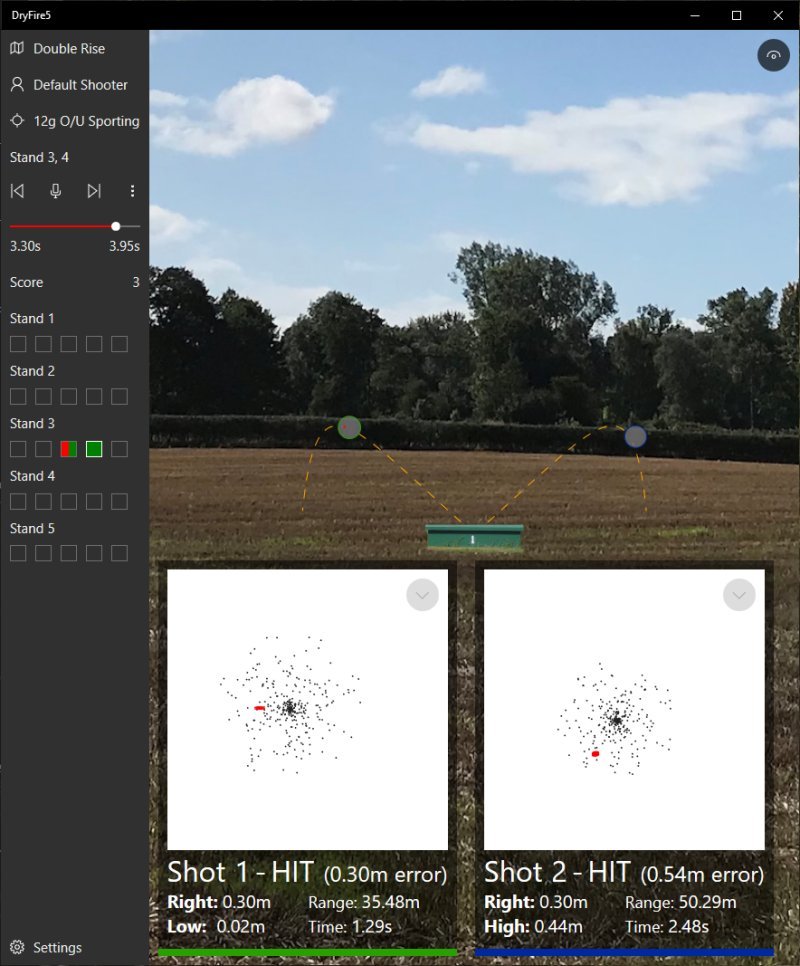
An example: Double Rise stand 3
Note: the video below is captured from the PC/laptop screen. The laser version does not use a data projector so you do not see the background or clay images on the wall/screen - instead you see the targets as moving laser dots.
The video shows the selection of a Double Rise layout then shooting from stand 3.
Normally DryFire steps through the targets in sequence, like shooting a round outdoors, but "Repeat target" allows a single target to be practised on its own.
Target trajectories are shown as dotted lines when a stand is selected - though they are not normally shown on the wall/screen when you are shooting - that would be cheating!
However, dragging the progress bar above the score card allows you to see the trajectory, the location of the clay, and the best aim point (the small cross), at any time during its flight. Of course, we don't "aim" at clays so the "aim point" is where the barrel of your gun needs to be pointing to allow the correct amount of lead.
The aim point can also be seen after "Pull" is called and the clays are released
In this case both targets were hit and you can see the shot pattern relative to the clay and enlarged sections providing more details about the exact location of each shot.
Explaining the feedback
The example below shows two different shots taken from stand 3 during a Double Rise simulation. Note: the screen was reduced so the image would fit on this web page.
- The first shot (green border) was low and to the right - as shown in the left hand result box. The circular image shows the shot pattern relative to the clay's trajectory which is displayed as a dashed yellow line.
- The second shot (blue border) was very high and to the right - it was also taken very late with the clay over 50.29m from the trap.
- The two "error" values, 0.30m and 0.54m, show the closest distance of the centre of the clay from the centre of the shot pattern - sometimes called "aiming error".